How To Publish ROKU Channel
4 Way Technologies is a leading Roku app development company across the globe. Our highly skilled and experienced Roku app developers are proficient in providing feature-rich and impeccable Roku-based products. Along with robust Roku applications, our development team is also capable of delivering the required software solutions within the given timeline as per the needs of your business.
As the demand for Smart TV app developmentis increasing day by day, publishing and creating your own Roku channel is a smart move. Publishing your ROKU channel isn’t tough at all, thanks to the ROKU development team. But, mind you publishing does require a few things of the channel such as its source code, images, and fonts all to be “packaged” into a bundle that gets ciphered. By means of this feature, ROKU developers allow ARM developers to publish their channels while keeping all intellectual property and data safely encrypted.
In this article, we have discussed the process of publishing the Roku channel.
Introduction
After you’re done with testing and ready for deployment of your channel, you can publish it using the Developer Dashboard. If you have developed a public channel it will be allowed on the Roku Channel Store, it will be interpreted by Roku developers during the certification process. If you want to update your existing channel, the updated publishing will be done using the Developer Dashboard only.
The Roku platform supports two types of channels –
- Public channel – distributed in the Roku Channel Store and discoverable from the Search feature on the Roku home page.
- Non-certified channel – not available in the Channel Store and used for testing purposes or limited sharing. The connection to the channel can be only be established using the channel’s specific access code.
What are the Prerequisites and Guidelines for Creating Roku Channel?
For successfully creating a Roku channel, you have to follow the steps:
1. Creating your design assets carefully
2. Carefully read the Pre-certification Check List for certification criteria.
3. Packaging of your Roku Channel.
4. Publishing your channel.
After successfully creating your own Roku channel are you concerned about the steps to publish your Roku channel? We’ll together go through the process of publishing your Roku channel, but before let’s learn about Direct Publisher and Developer SDK.
Roku developers have come up with two ways for ARM developers to publish their channel – Direct Publisher and Developer SDK. Direct Publisher is the most natural way to generate an amazing TV experience. The Developer SDK is a great option for customized channel Roku development.
Here, we follow the Direct Publisher approach. Roku developers have provided sample assets for the ARM developers to use. You can anytime delete these assets out from your channel’s properties once you’re ready to publish.
Requirements To Follow This Guide:
- A Roku device.
- A Roku account: my.roku.com/signup
- Download the sample channel assets: channeltv-images.zip
- Have the sample content feed available: https://api.myjson.com/bins/4tu28
You should also read about the How to Integrate Google Analytics for Roku Application ?
What are the Steps to Publish the Roku Channel?
Follow the below written steps to publish the Roku channel:
1. Fill out channel properties.
2. Add a content feed URL.
3. Upload channel branding.
4. Add category tag(s).
5. Fill out Channel Store information.
6. Add screenshots of your channel.
7. Provide customer support information.
8. Preview the channel on a device.
Important! Most fields in Direct Publisher include a small “?” button next to them. Clicking that icon will show you more information about what they’re used for.
1. Channel Properties
To get started, go to the Manage Channels page in your account and click on “Add Channel:”

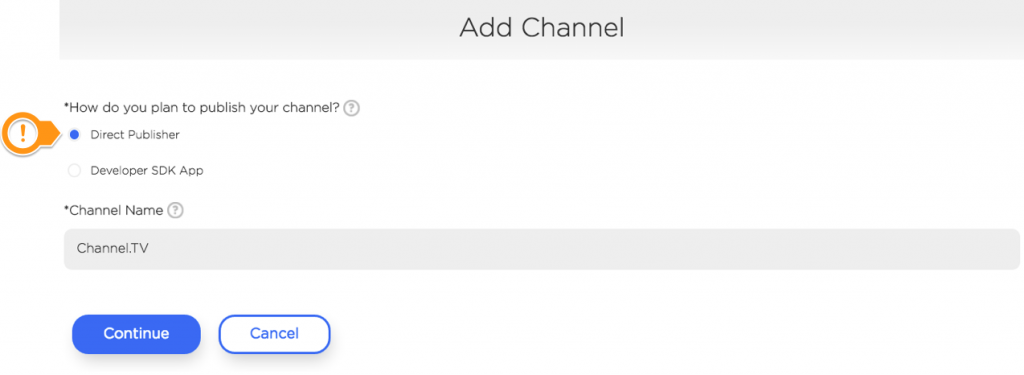
All necessary information on the Channel Properties page starts with default values, so all you have made changes when necessary.
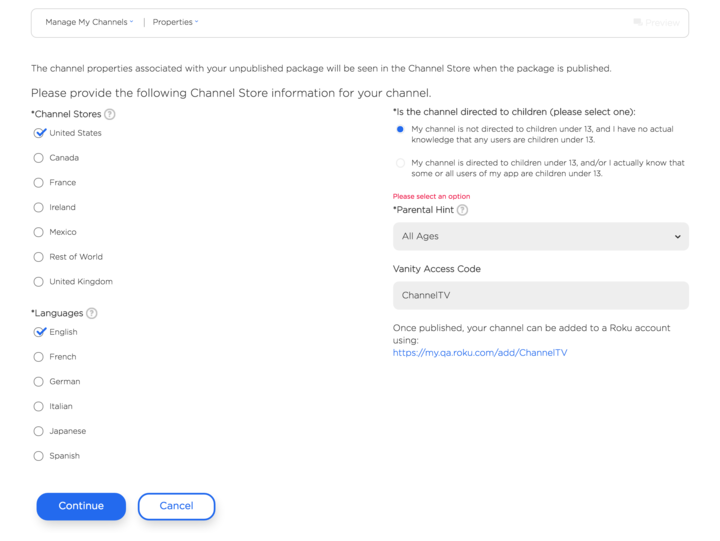
- Channel Stores: This defines the geographical area i.e. countries where your channel will be accessible.
- Note: Select only those countries where you have the legal right to share your channel’s content.
- Languages: You will be able to add localized channel descriptions in various languages according to the country for each field you add.
- Is the channel directed to children: This field helps assure that only age-appropriate ads are showed to children if you opt to include ads in your channel.
- Parental Hint: You can add a parental hint to make sure your channel is downloaded only by age-appropriate users.
- Vanity Access Code: You can customize this field as per your channel’s theme to make a more memorable, marketable, and searchable download URL for your channel.
When your channel properties are okay and you’re satisfied, click “Continue” to go to the next screen.
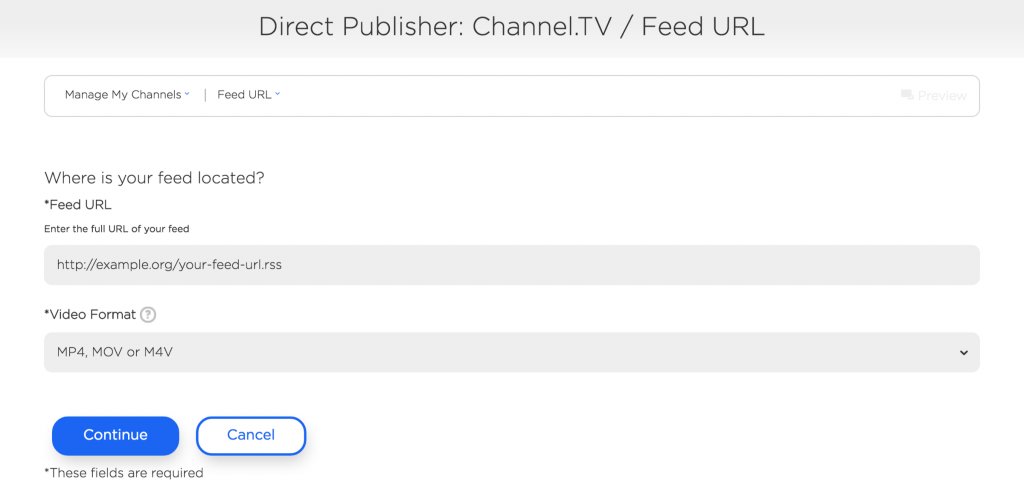
2. Add a Content Feed URL
The Feed URL section is where you give your content feed to Roku, which is in a file form that includes information about all the videos(URLs, title, description, language, etc) that are included on your channel. For demonstration purposes, let’s use this sample feed URL that includes a few original Roku videos: https://api.myjson.com/bins/3sa1g.
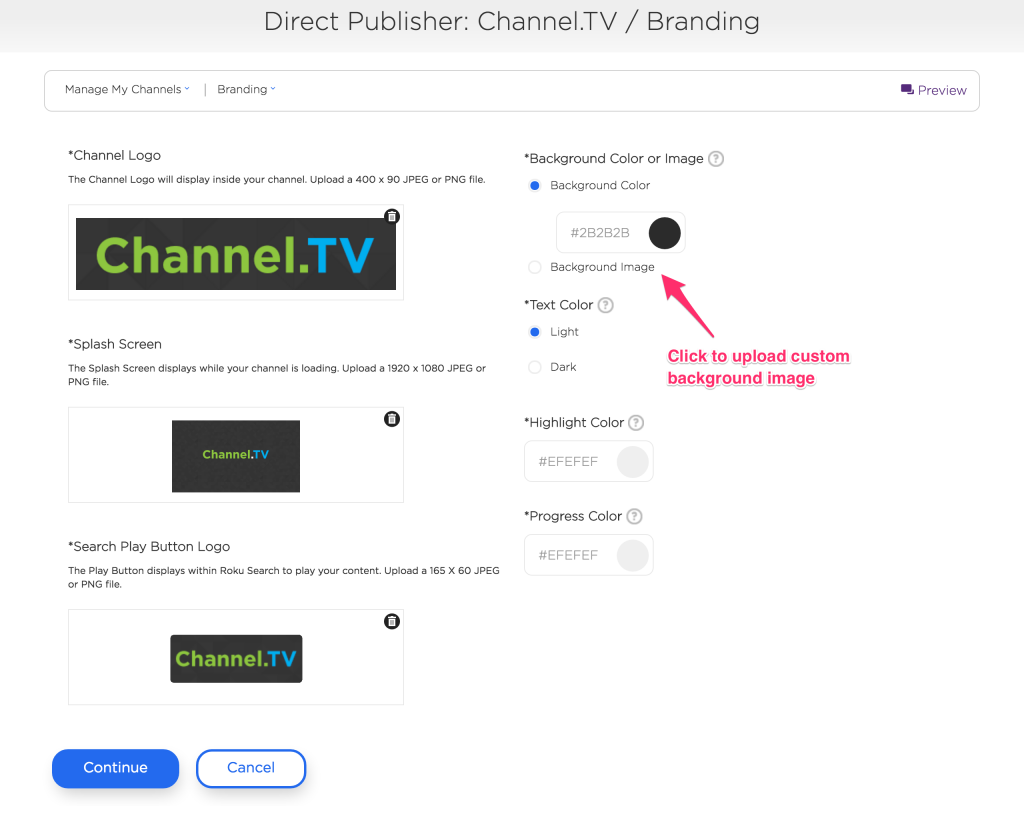
3. Channel Branding
The next step takes you to the Branding section! In this step, you can brand your channel with customize logo, a background image, a search icon, and your brand’s colors.
For the tutorial purpose, you can use the sample assets provided to you in the beginning, start with unzipping them.
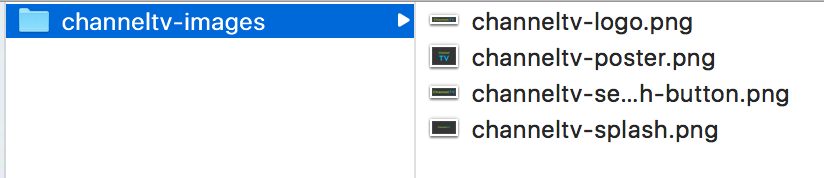
This sample asset file includes a channel logo, channel poster, splash screen image, and a search icon that we can use here:
Start with uploading the channel logo, splash screen, and search icon images to their respective fields. To match your channel’s aesthetic you can change the colors accordingly on the right or can also upload a customized background image.
Tip:Adobe Color CC is a free tool that can help you with various colors for your channel’s branding.
4. Add Category Tag(s)
The next step heads towards is the Categories section.
Each category you formulate will appear as its own row of content at the end product of yours, your channel. This categorizing will make it more easy for the end-user to find the content they’re interested in viewing. Popular types to categorize the content include genres, directors, or topics.
Direct Publisher has three default categories:
- Continue Watching (this is always active)
- Most Popular(most searched)
- Recently Added
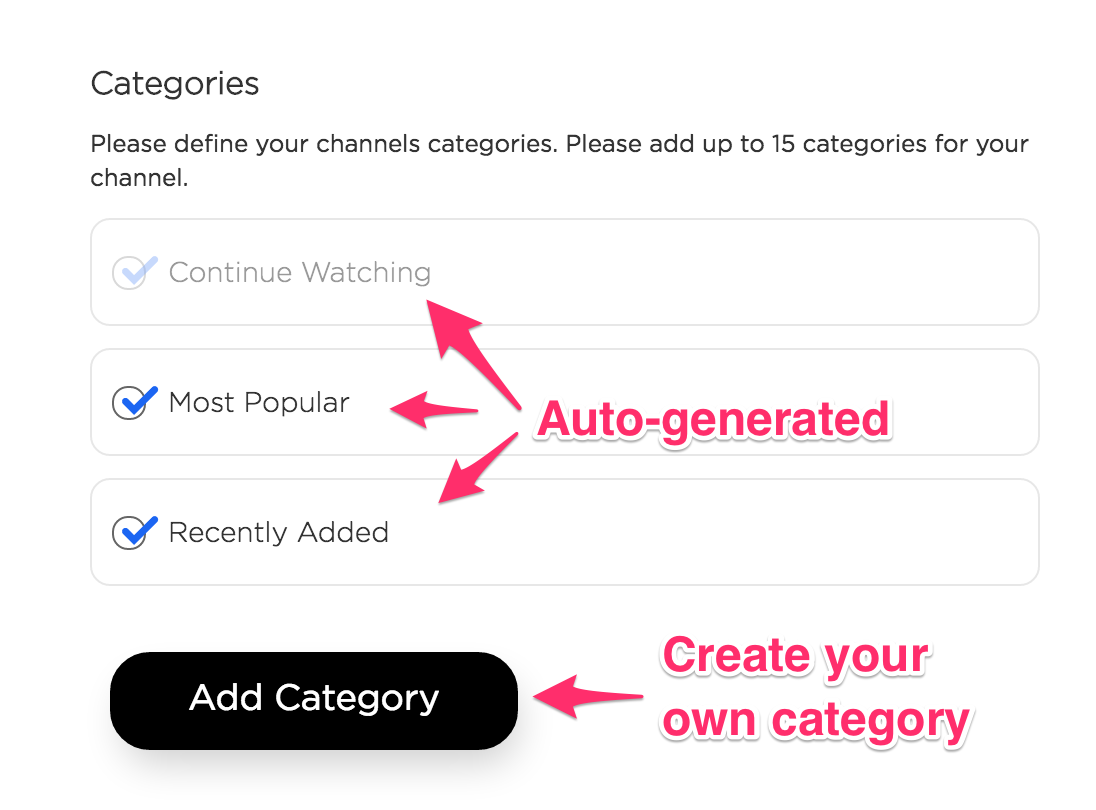
You can make your own unique categories by clicking “Add Category.”
New categories are always made by using tags or playlists from the content that you have provided. The example content feed used in the Feed URL section includes multiple tags, so we’ll use those to demonstrate how to create categories.
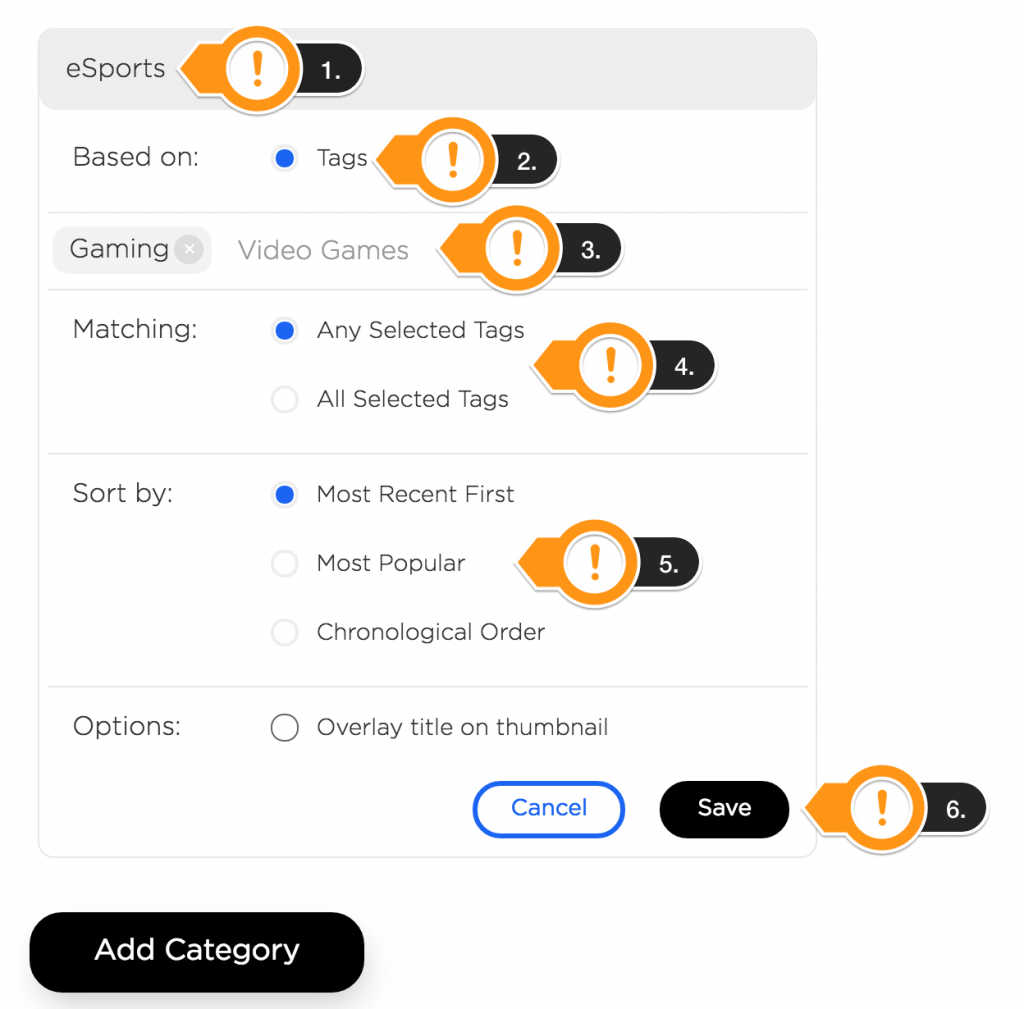
To create your own category, the steps are as follows –
1. Enter a suitable name for your category. This is the title that will display on your content row at the end product.
2. Select whether your category is based on tags or either playlist.
3. Enter tags clearly that appear in your content feed. Content labeled with these tags will populate your category.
4. Provide laws for each category you create. Make sure you enter tags carefully if your content looks pretty good with only one tag no need to overpopulate it.
5. Decide upon the order of categories, in which it should appear.
6. Click save to save and update all the changes made.
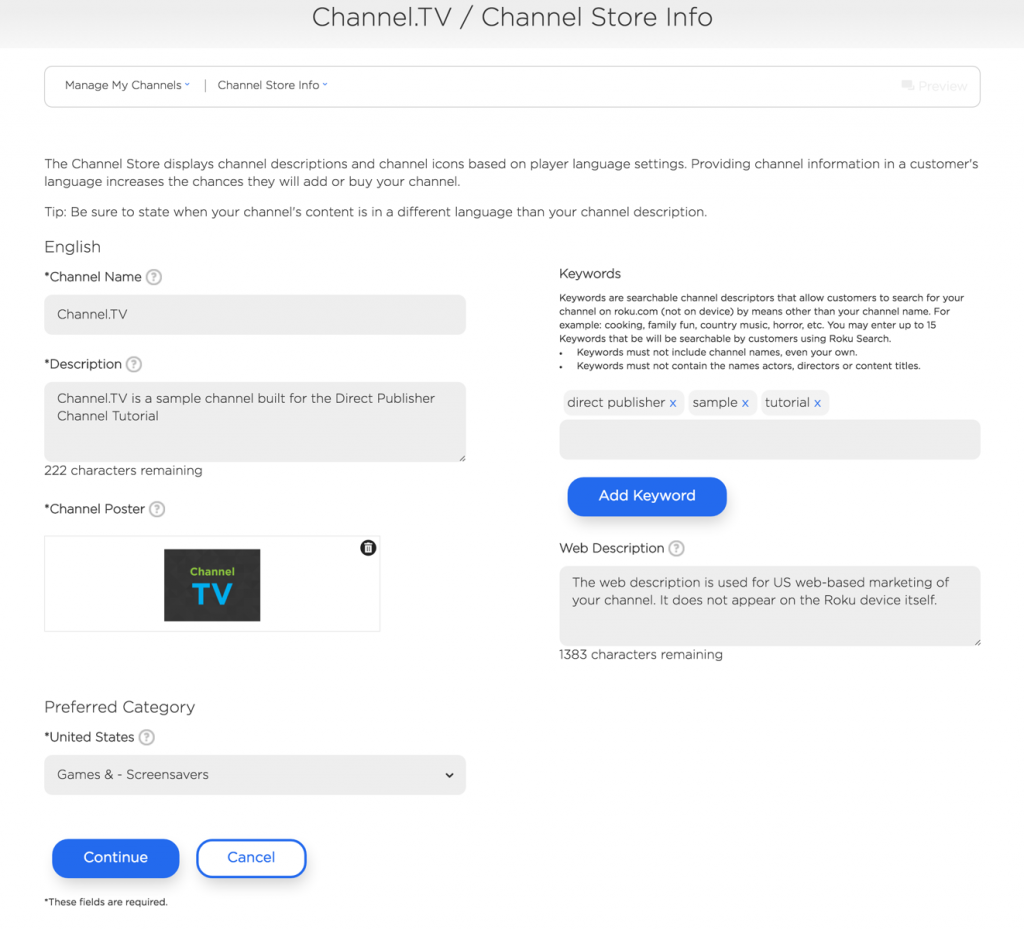
5. Channel Store Info
The next stop is the Channel Store Info. Here you can customize what information must be shown to the user while they browse new channels to download/buy in the Channel Store.
First, see how to update the description text. After that, we’ll go to use the remaining image that was part of the .zip file. The image selected will be appeared as the channel icon in the Roku Channel Store. At last, we’ll choose the “Preferred Category” for the channel. This category will be listed within the Roku Channel Store where your channel will be live.
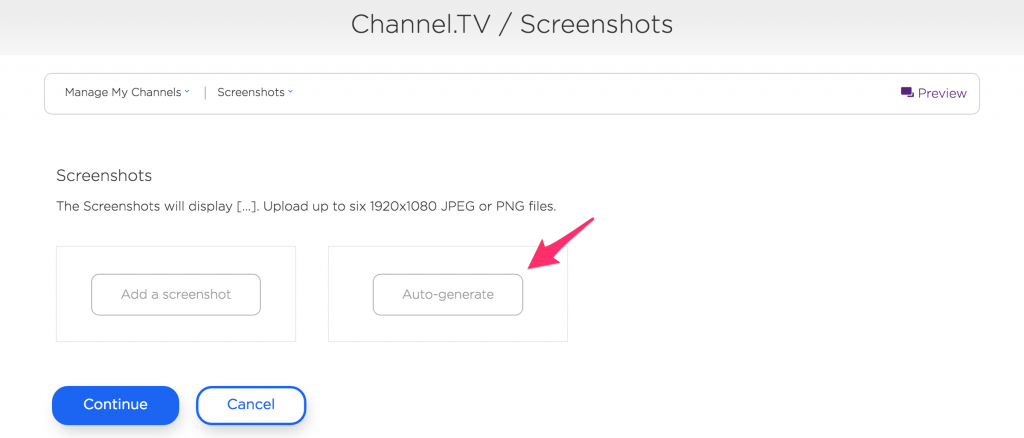
6. Screenshots
The next step is about uploading the screenshots. At the screenshot page, you can upload images of your own Roku channel so that users can have a look at it while browsing the Channel Store. You can upload up to six images, or you can also auto-generate the images.
For this tutorial, we will use auto-generated screenshots:
7. Support Information
In the end, you have to give some basic customer support information about your channel. So that the customer won’t be worried.
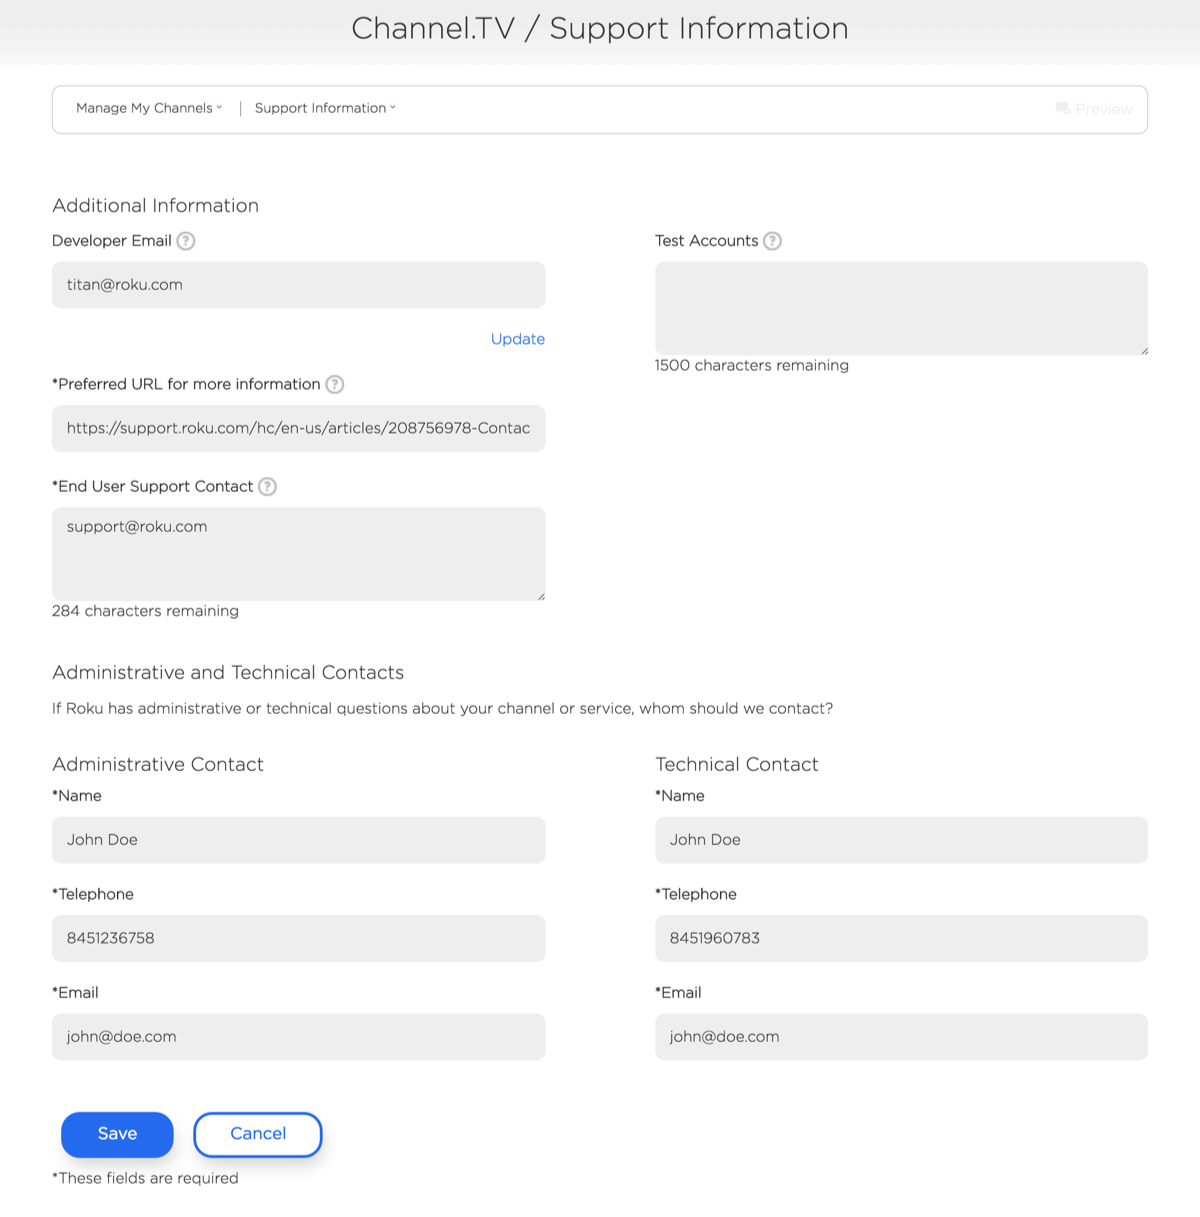
NOTE: “Test Accounts” field is not compulsory for Direct Publishers.
8. Channel Preview
After covering all the 7 steps, your sample channel is fully developed and ready for installation! On the Preview and Publish section, you will observe a URL under “Device Preview.” When you click on this link it will take you directly to a page where you can add your new channel to your own Roku device and preview it. You can share the link with your friends if you want a second opinion on your channel.
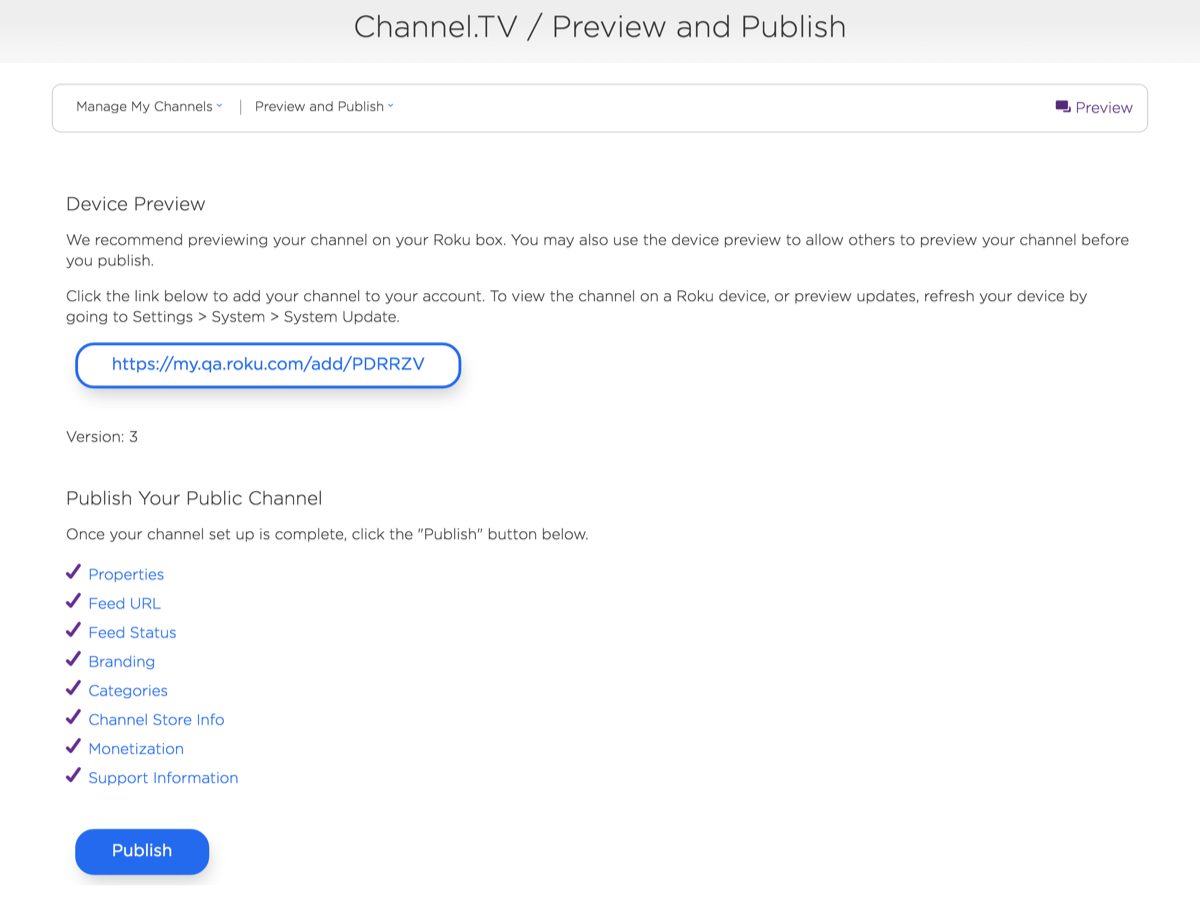
It usually takes up to 24 hours to automatically show the channel on a Roku device. If you want to access it immediately, go to your Roku device Settings > System > System Update.
Feed Status
The Preview and Publish page comprises a supplementary page called Feed Status, which provides additional information about the functionality of your content feed.
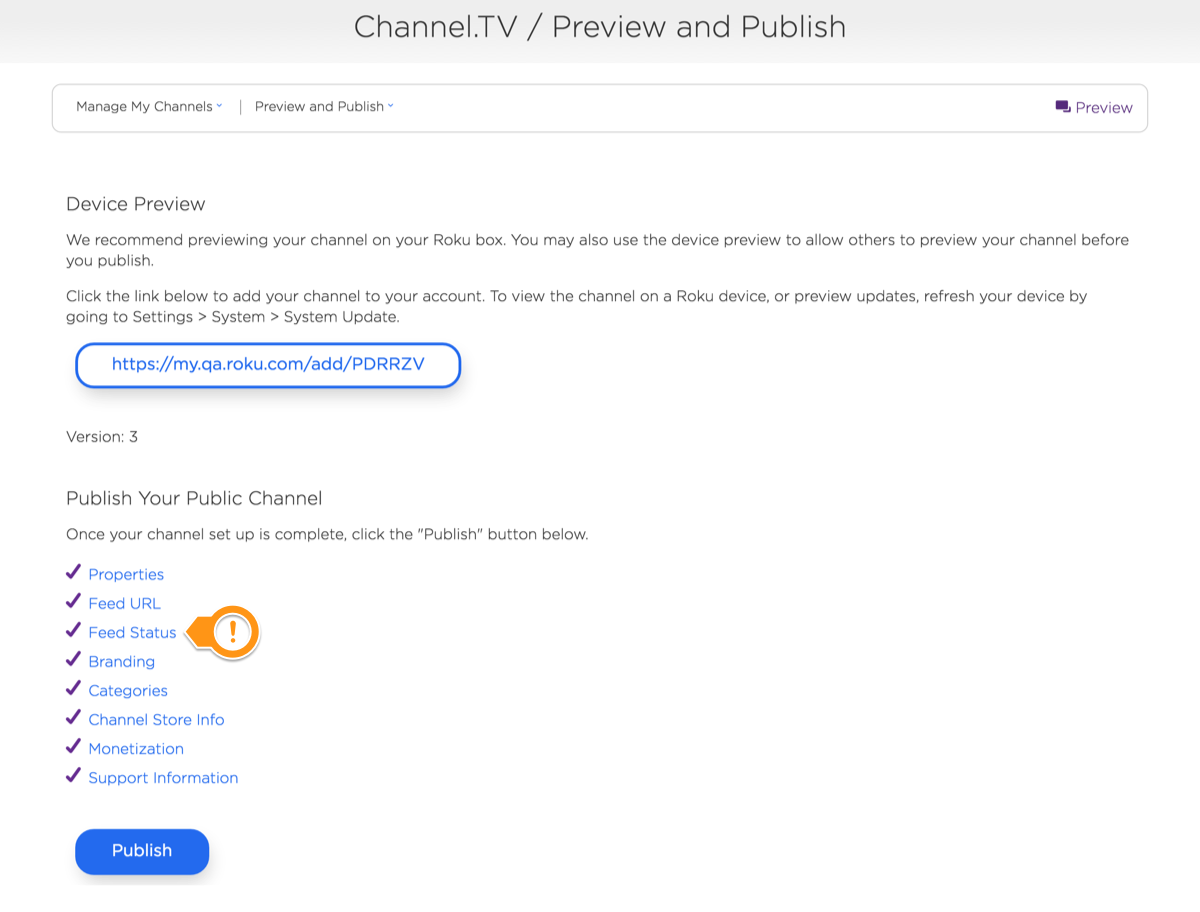
Congratulations! Your Own Roku channel is created and published using Direct Publisher! Now, you can change the channel and the assets to match your brand.
Conclusion
We hope that you will find this article helpful. After going through this blog, you will be easily able to use Roku Advanced Layout Editor for the design and development process of your Roku applications. If you still face some issue, feel free to contact 4 Way Technologies Roku TV developer for a complete and robust software solution.

A freelancing blogs and e-books writer who keeps you up with the trending technologies and user guides. A blogger who is currently a post-graduate living in United Kingdom and trying to make her niche as a Data Scientist. Before taking a deep dive into the "Data-World", she got a Bachelor's Technology degree in Computer Science and has always dreamed of writing as a kid which inspired her to write wonderful content with the right amount of technical terms to make it easy for the beginners and as well full-fledged developers to grasp a hold onto the computer technologies.