Steps to Migrate an AWS Git Repository
Introduction
AWS CodeCommit is a source control and fully-managed service, which allows several organizations to host highly scalable and secure private Git repositories with ease. There are a lot of benefits for hosting the source code with AWS CodeCommit such as its high availability, fully managed experience, extensibility, and security with the existing tools.
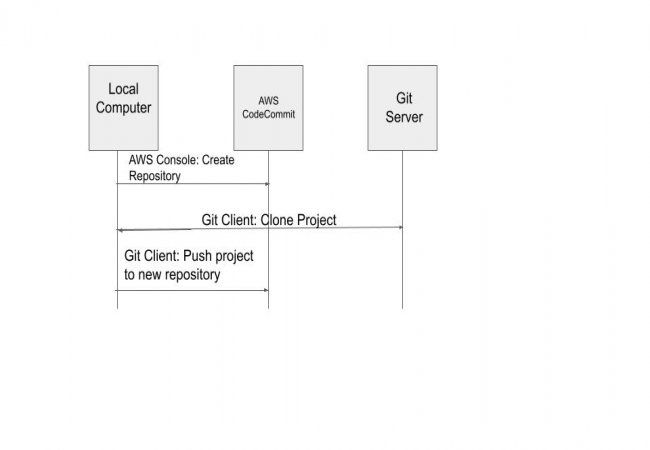
The following diagram shows the migration process of an AWS Git repository CodeCommit.
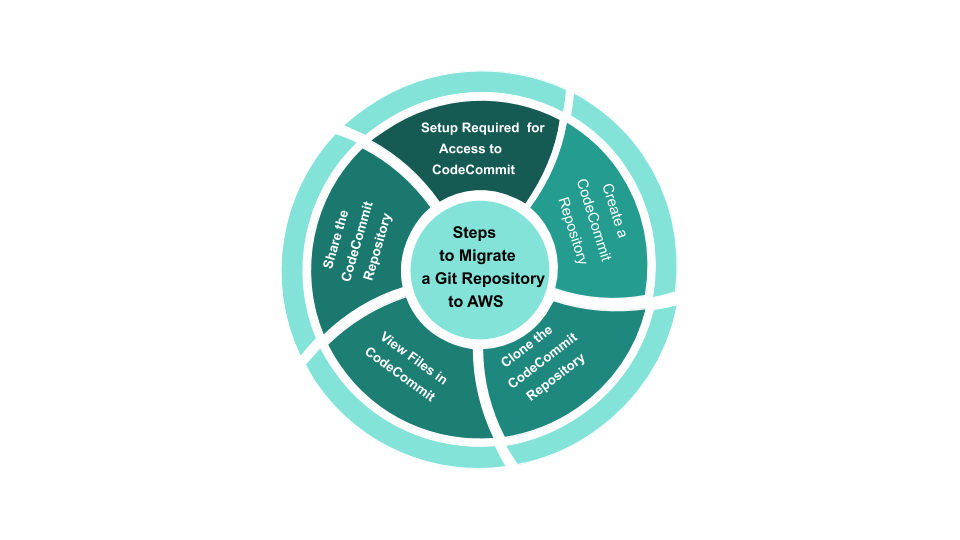
This blog will guide you step by step and helps you to understand how to migrate an (Amazon Web Services) AWS Git repository. This complete process will include:
- Initial setup required to access CodeCommit.
- CodeCommit repository creation.
- Cloning the repository and pushing it to CodeCommit.
- Viewing files in the CodeCommit repository.
- Sharing the CodeCommit repository.
So, let’s hop in!
Step 0: Setup Required for Access to CodeCommit
Before anything, you just need to produce an IAM user for CodeCommit and assemble your native pc for access. There is a need to install the AWS interface to enjoy the AWS managed services for CodeCommit and one can do most CodeCommit tasks without it as well. When you work with Git at the command line or terminal, the AWS interface offers flexibility.
In case, suppose you are already done with the setup for CodeCommit, you can directly jump to Step 1.
How to create and configure an IAM user for accessing CodeCommit?
Please feel free to consider the below-mentioned information!
1. Create an AWS account.
2. You should create an IAM user for your AWS account and ensure the presence of an access key ID and a secret access key associated with that IAM user.
3. Next, you should sign in to the AWS Management Console and should open the IAM console.
4. Within the IAM console, open the navigation pane, select Users, and then, should select the desired IAM user to configure for CodeCommit access.
5. For the Permissions tab, you should select Add Permissions.
6. Within the Grant permissions, you should select Attach existing policies directly.
7. From the list of policies, select the desired managed policy for CodeCommit access.
8. After the selection of the desired policy, choose Review to evaluate the list of policies that are attached to the IAM user. If the list is correct, then you should select Add permissions.
How to install and configure the AWS CLI?
1. The first step is to download and install the AWS interface on your pc.
2. You should run the command to verify the CodeCommit commands for the AWS interface installation.
3. The command must return a list of CodeCommit commands.
4. You should configure the AWS interface with the configure command.
5. When prompted, you should state the AWS access key and AWS secret access key of the IAM user to use with CodeCommit. And, you should ensure to specify the AWS Region where the repository exists.
6. You should reconfigure the AWS interface with the default Region name for connecting to a repository or a resource in the other AWS Region. Some of the supported default Region names for CodeCommit are:
- us-east-2
- us-east-1
- eu-west-1
- eu-west-2
- ap-northeast-1
- ap-southeast-1
- ap-southeast-2
- eu-central-1
- ap-northeast-2
- sa-east-1
- us-west-1
- eu-west-2
- ap-south-1
- ca-central-1
- us-gov-west-1
- us-gov-east-1
- Now, You need to install Git.
For Linux, macOS, or Unix:
You need to install Git on your pc to work with files, commits, and other information in CodeCommit repositories that support Git versions 1.7.9 and later. You can install Git for Linux, macOS, or Unix from Install Git
- For Windows:
You must install Git on your pc to work with files, commits, and other information in CodeCommit repositories that support Git versions 1.7.9 and later. You can install Git for Windows from Git For Windows.
You must configure Git credentials for CodeCommit that support both HTTPS and SSH authentication for a complete setup. To access CodeCommit, you should use an SSH key pair.
Read also:- Important ROKU Development Tips
Step 1: Create a CodeCommit Repository
Follow the steps given below in order to create a CodeCommit repository.
1. Open the CodeCommit console.
2. You should select the desired AWS Region In the region selector.
3. Select Create repository on the Repositories page.
4. Then, enter a name for the repository in the Repository name.
5. Although, this step is optional. But, this will help you and other users to identify the purpose of the repository. There, you have to enter a description for the repository.
6. You can skip this step as well. This step helps you to organize and manage your AWS resources. There, you need to select Add a tag to add one or more to your repository.
7. At last choose Create.
Great Job! Now, the repository will appear in the Repositories list.
Step 2: Clone the CodeCommit Repository
In this step, you need to create a local repo to clone an AWS Git repository on your local computer. Then, you will be required to push the contents of the local repo to the CodeCommit repository you created earlier. Follow the steps given below:
1. From the terminal or prompt on your native pc, run the git clone command with the –mirror option to clone a bare copy of the remote repository into a new folder. This is merely for migration, not for interacting with the migrated repository in CodeCommit.
2. Next, change directories to the directory where you made the clone.
3. Now, specify the URL and name of the destination CodeCommit repository to run the git push command.
Congratulations! You are doing well!
Step 3: View Files in CodeCommit
After you are done with step 2, you can view all the files in that repository by using the CodeCommit console:
1. Open the CodeCommit console.
2. Repositories, choose the name of the repository.
3. View the files in the repository for the branches, the clone URLs, the settings, and more.
Step 4: Share the CodeCommit Repository
When you create a repository in CodeCommit, two endpoints are generated: one for HTTPS connections and one for SSH connections. Both endpoints stay active whichever protocol you recommend to your users.
Before sharing your repository with others, you must create IAM policies that allow other users to access your repository.
Create a customer-managed policy for The AWS Git repository
1. Firstly, you should sign in to the AWS Management Console and then, open the IAM console.
2. In the Dashboard navigation area, you should select Policies, and then, choose Create Policy.
3. On the Create Policy page, next to Copy an AWS Managed Policy, choose Select.
4. On the Copy, an AWS Managed Policy page, in Search Policies, you must enter AWSCodeCommitPowerUser. Choose Select next to the policy name.
5. On the Review Policy page, in Policy Name, you must enter a new name for the policy.
6. Now, choose the Validate Policy. After the policy is validated, click on Create Policy.
In order to manage access to your repository, create an IAM group and add IAM users in that group, and then, attach the customer-managed policy you created in the previous step or any other policies required for access. Follow the steps given below:
1. Firstly, sign in to the AWS management console and open the IAM console.
2. In the Dashboard navigation area, you must choose Groups, and then, choose to Create New Group.
3. On the Set Group Name page, in Group Name, enter a name for the group, and then, choose Next Step. You should include the repository name as part of the group name.
4. Now, you should select the box next to the customer-managed policy you created in the previous section.
5. On the Review page, you should select Create Group. IAM creates this group with the specified policies already attached. The group will appear in the list of groups linked with your AWS account.
6. Choose your group from the list.
7. On the group summary page, choose the Users tab, and then, click on Add Users to Group. On the list that shows all users associated with your AWS account, select the boxes next to the users to whom you are willing to allow access to the CodeCommit repository, and then choose Add Users.
8. After adding your users, close the IAM console.
After you have created an IAM user to access CodeCommit using the policy group and policies you configured, send users the information required to connect to the repository. This can be done with the following steps given below:
1. Open the CodeCommit console.
2. In the region selector, choose the AWS Region where the repository is created.
3. On the Repositories page, you need to find the name of the desired repository to share.
4. In the Clone URL, choose the desired protocol for your users’ use.
5. Now, send your users the clone URL along with any other instructions. And ensure to include the configuration information for the connection protocol.
Finally! We are done.
Read also:-Introduction to SAMSUNG Smart TV
Conclusion
We hope that you found this blog helpful. If you are a beginner and want to migrate the AWS Git repository to AWS CodeCommit, you would be able to do that with ease after going through this article. Please provide your valuable feedback in the comment section below.

4 Way Technologies is a premium IT services company that develops web, mobile, and SMART TV applications using cutting-edge technologies like React, Node.JS, Deno, Go lang, AWS, and AEM. We establish our thought leadership by sharing content and insights around technology.