5 Easy Steps for Create a Tizen App for Samsung Smart TV
With nearly 30% of the market share, Samsung Smart TVs continue to be the global highest TV manufacturer for 16 consecutive years. It is quite discernible that a large majority of Smart TV users own a Samsung device. Samsung holds its frontrunner status in the Smart TV market with its ingenious technology and sophisticated design with enhanced user experience. If you are someone who wishes to reach their users through Smart TVs, you are going to need a Tizen app.
Tizen at a Glance
Tizen is an operating system developed by Samsung Electronics in 2012. Samsung developed it to use it for their own devices, mainly smartphones. Since they joined the Smart TV market, Samsung also has Tizen as the proprietary OS for their Smart TV devices. Given the advent of Smart TVs and Samsung’s parallel rise in the Smart TV market, developing Tizen apps has become a must for OTT companies, or anyone who wants to reach their users through the platform of Smart TVs.
Creating a Tizen app can be summed up in 5 simple steps. However, the process can get a little tricky due to the strict certification policies held by Samsung. In this blog, we will see how to develop a Tizen app for Samsung Smart TVs using Tizen Studio.
1. Set up the Tizen Development Environment
Before we begin developing a new Tizen project, we need to set up a development environment for it. Tizen projects are developed on Samsung TV SDK. We are going to need to install the Samsung TV SDK first. The Samsung TV SDK is a collection of tools to develop Tizen apps and comprises these components:
- Tizen Studio IDE
- TV Simulator
- TV Emulator
- Web Inspector
Install the Samsung TV SDK
To set up the development environment, we need the Tizen Studio IDE. The rest of the components would be useful in the later steps of app development, as we will see.
Before we install the IDE and begin working on Samsung TV SDK, we need to check the hardware and software prerequisites to ensure everything is in place. Next, we are going to need to install the following three components:
- Tizen Studio IDE
- Samsung TV Extensions
- Samsung Certificate Extension
We will install Tizen Studio, our IDE, using the Tizen Studio installer:
- Download Tizen Studio
- Run the Tizen Studio Installer
- Accept software license

- Set Data Location and SDK location from the Installation Setting
- Click on Install

- Install additional tools by checking on Launch the Package Manager
- Click on Finish
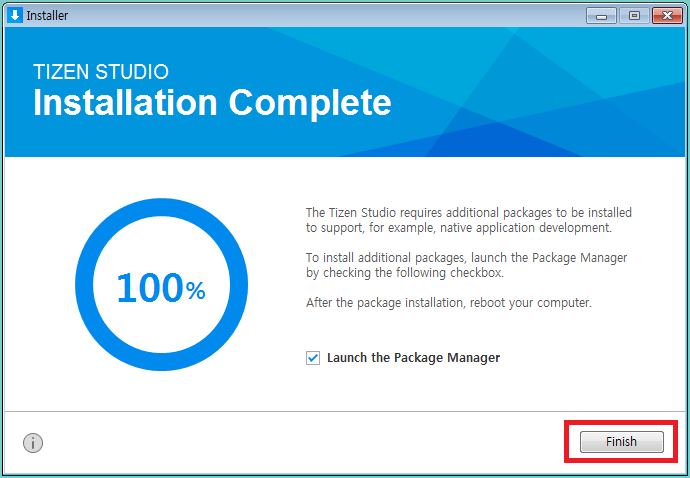
The Package Manager would now be launched
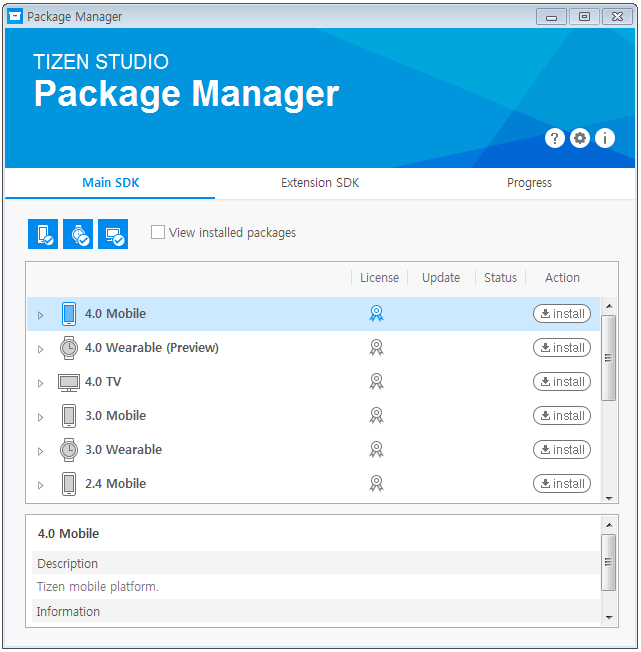
Now, we have to install some required extensions:
- Click on the Extension SDK tab on the Package Manager
- Install
TV Extensions-<version>and Samsung Certificate Extension from the list - Accept Software License

Your Tizen Studio is now all set.
Create Certificate Profile
Tizen follows some strict certification policies. You must create a certificate profile before beginning any Tizen project. All Tizen projects must have valid certifications with signatures before they are deployed. The signatures act as verification for the source of your applications and cannot be altered once published. It is therefore crucial to create a certificate profile and import your certifications before you begin developing your Tizen project. To import certificates, you would need the following things:
- Samsung Certificate Extension - you will receive this once you download the Samsung TV SDK (as discussed in the previous section)
- Device ID (DUID) of the device where you wish to install your application
- Now we can proceed to create a certificate profile on Tizen Studio.
- Go to Tools and click on Certificate Manager

- On the Migration for Certificate Profile dialog box, click on Cancel

- Now, click on the + sign on the top right
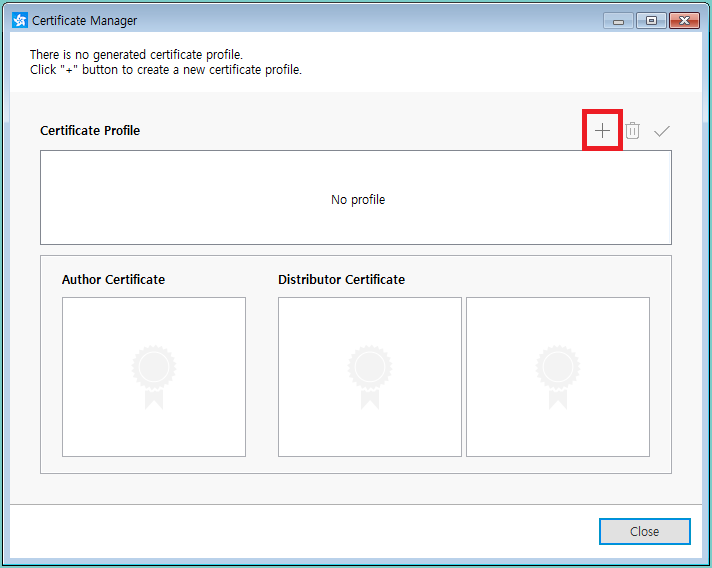
- Select Samsung
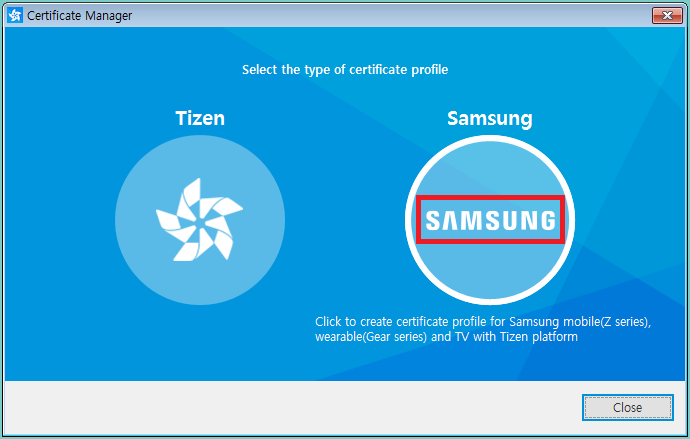
- Click on the TV option and then on Next

- Choose a name for your certificate profile and click on Next

- Import your author certificate into this certificate profile
You can create a new Author Certificate from Certificate Manager using your Samsung tv app Developer Account. Remember to create a distributor certificate with every Author certificate. Additionally, always define a backup path for your certificate files
Add all necessary author certificates in Certificate Manager before beginning any project.
2. Design the Project
To develop an app, we must have a clear idea about the app design. This includes the UI design and all the features that you would like to incorporate into your app. To have a blueprint of the components of your app before beginning the development is simply good practice. It helps in optimizing time and resource usage as your development process would be highly streamlined if you have a preset blueprint design of the project. It is also important that you do not make too many alterations to the design while developing. Therefore, you should allocate and spend some time designing your Tizen application.
In this section, we will discuss some of the key features that you would invariably have to build into your Tizen app.
Simple UI
User Interface is the foremost priority during app design. While designing the UI for your Tizen app, it is advisable to keep four factors in mind, simplicity, clarity, user control, and consistency. Make sure that your UI design is clutter-free and easy to navigate to enhance user experience.
Scalable Resolution
Samsung TVs have a fixed aspect ratio of 16:9. The UHD TVs support a resolution of 1920x1080 pixels while the FHD TVs have 1280x720 pixels resolution. It is important to keep these numbers in mind while developing to ensure the best video quality and avoid sidebars on the screen.
Web Application Features
Smart TV applications can have most of the features you can think of for a web application. Remember this while incorporating features into your Tizen project.
Remote Control Function
Your users would most often interact with their Smart TV devices using a remote control. Although it is possible to add inputs through keyboards, mice, or gamepads, those are not very common with Smart TVs. It is important to consider this during the development of your Tizen app. For example, you would need to have virtual keypads for alphabet or numeric data inputs.
3. Develop your Project
With the development environment set up and the project design planned, we can finally move on to the actual development process of our Tizen app. Developing a basic Tizen app is rather straightforward. You can choose from a large variety of prebuilt templates to add various desirable components to your Tizen app. Additional customizations would obviously require more time and skills to develop.
Create Project in Tizen Studio
Let us create a basic web application for Samsung Smart TVs on Tizen Studio. We shall use CAPH, a web UI framework for Smart TV apps for the UI. The project is going to be built using the Tizen Project Wizard, a Tizen Studio tool. Let us see how.
First, we have to launch Tizen Project Wizard:
- At the Tizen Studio menu, go File > New > Tizen Project
- Then click on New on the Tizen Studio toolbar
This would launch the Tizen Project Wizard. Here, you will be offered two options, Template and Sample. The Template option consists of a collection of basic template structures. The Sample option contains several sample apps that demonstrate the use of different APIs and UI designs.
Since we are trying to learn how to build a Tizen app, let us go with the Template option so that we can check out some customization options.
- Click on Template and then Next

- Choose Custom under Profile and Version

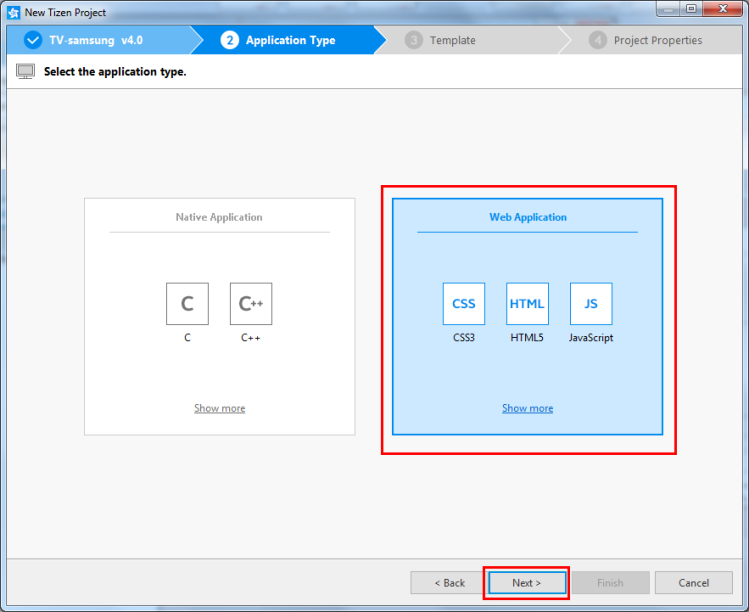
- Choose Web Application under Application Type since we are building a web application as we discussed.
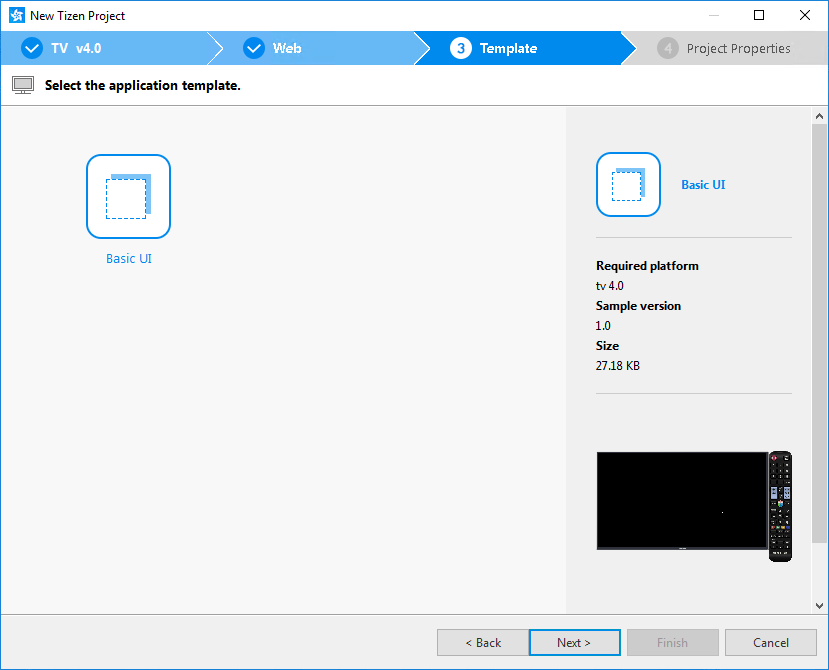
The Templates available on Tizen Studio, as we can see in the image below are:
- Basic Project: In this template, the main.js file comprises a keycode handling template required for managing remote controller keys. As the name suggests, this template is only sufficient for a basic general purpose.
- CAPH empty template for jQuery: This template is based on CAPH, the Smart TV app development framework (as mentioned earlier). It is based on jQuery. This template would allow you to build more complex apps allowing the development of customizations of your choice.
- Empty: This one is for when you want to build your Tizen app entirely from scratch, completely customized. This is an empty template, as the name suggests, consisting only of basic icon.png and config.xml files along with an empty index.html file.
- jQuery Navigation: This is a template for building jQuery Mobile-based apps.
Click on the template of your choice and click on Next.

When you choose to create your Samsung Smart TV app from scratch, consider implementing the following app features into your project.
1. Tizen Web Device API- This contains a set of APIs to give your TV web app some basic and important features, like rendering display on a TV device, enabling audio control and mute option, etc.
2. Samsung Product API- This is another collection of basic tools and APIs that enables necessary TV app features like VOD, volume control, Play/Pause button
3. Screensaver- Consider adding a screensaver feature to your app that would automatically make your app switch to a still display after a chosen amount of idle time. This would avoid screen burn, and enhance user experience.
4. Viewport Scaling- In case the resolution applied in your app does not always match the standard hardware resolution, consider adding a viewport scaling feature that would scale up or scale down the resolution of your app as necessary.
5. IME- Since Smart TVs usually receive user inputs through remote control, it is important to implement an Input Method Editor or IME in the form of a virtual keyboard.
6. Multitasking- Implementing the multitasking feature would allow your app to preserve its current state when the user shuffles between apps on their Smart TV, in turn, enhancing the UX of your app.
7. TLS Support- Samsung does not support SSL (Secure Sockets Layer) for data safety. Instead they have Transport Layer Security (TLS). Implement TLS versions 1.0, 1.1, or 1.2 to enable the transmission of encrypted data browsers and servers for the data safety of your app.
Moving on with creating our basic web application on Tizen Studio.
Once we choose the Basic template, this is what your Tizen Studio should look like.
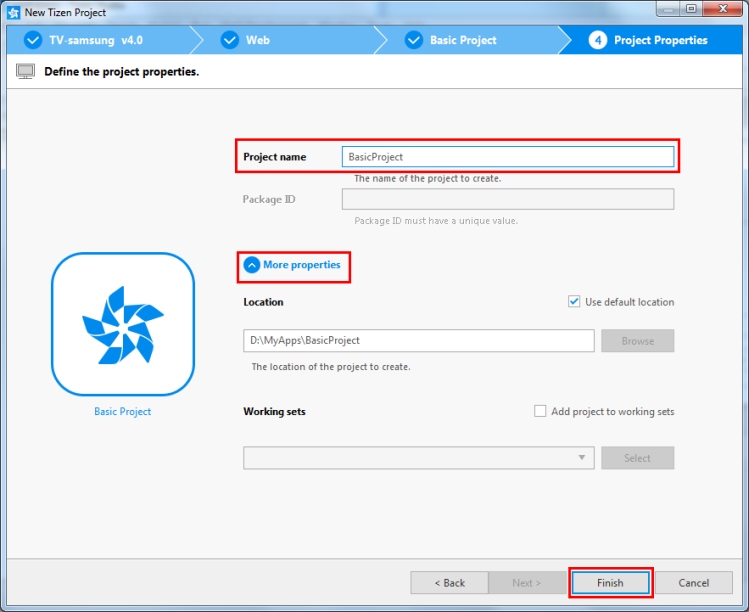
Once we click on Next on the Template window, we are taken to the Project Properties window. Here you would have to enter the project properties such as Project name, Package ID, location, and working set.
- Choose a project name between 1-50 characters, avoiding Tizen API names. Also, note that the project name is case-sensitive.
- Also note, if you do not choose a project location manually, the default location of your project would be a directory named $<workspace_location>/<project_name>
After you have filled in the properties, click on Finish.
When you click on Finish, you will be taken to the Project Explorer view.Here you can find the files in your project. Here is the list of some of the important folders and files in your project:
- css: This folder would contain all the CSS files that you would use to style the contents of your Tizen app.
- js: This folder would contain all the JavaScript files needed for the implementation of the functional logic of your Tizen app.
- config.xml: This file is the Application configuration file required by Tizen Studio for installing and launching your Tizen app.
- icon.png: This is the app icon file that Tizen Studio uses for your app
- index.html: This is the primary HTML file for the app screen layout

Manage App Configurations of the Project
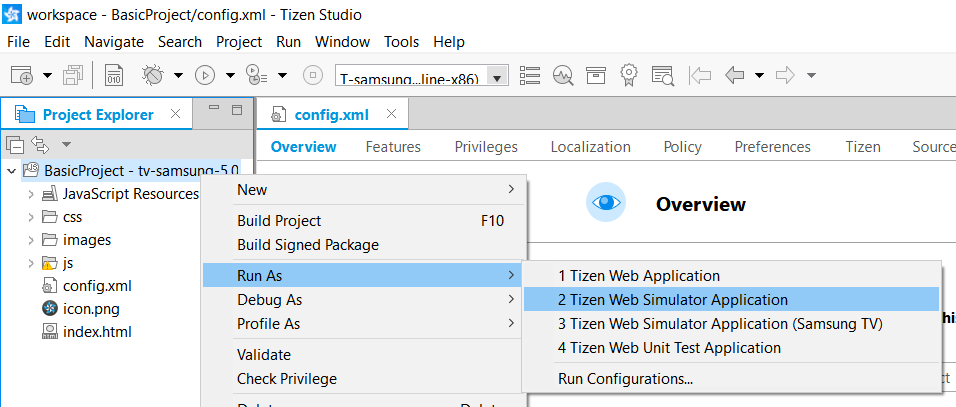
To configure your app in Tizen Studio, you need to open the Web Application Configuration editor from Project Explorer.
At Project Explorer, double-click on config.xml to open the file. This will show the following window:

Let us go through the tabs in the configuration editor as viewed in the above window:
- Overview- In this tab, you can determine the general information of your app, like the name and icon.
- Features- Under the features tab you can select the necessary software and hardware features of your app. This data would be necessary for application filtering of your app in the Tizen Store.
- Privileges- In this tab, you would need to specify the security-sensitive API/API groups that are to be accessed by your app.
- Localization- Here you can specify localized values of the app name, license, and app description.
- Policy- This tab is necessary when you want to request network resource permissions for accessing external network resources.
- Preferences- Here you would need to specify the name-value pairs for your app. These name-value pairs could be set or pulled from the app.
- Tizen- This tab allows you to modify the Tizen schema extension properties of your app.
- Source- Under this tab, you can see as well edit the source code of the config.xml file.
Once you have configured your app, save that configuration by simply selecting File from the Tizen Studio menu, and clicking on Save All.
Build the Project in Tizen Studio
Now that our app is created and configured, it is time to build the app!
Since we chose the Basic Project template for the sake of this blog, our project does not need any code modifications, and we go completely by the default features in the basic template. However, if you are creating your app from scratch, the code for your application must be ready at this point. Once the code is ready, we move on to the building process for the app. In this process, Tizen Studio compiles the JS and CSS files of the app, as well as conducts a validation check.
The building process itself can be automatic or manual in Tizen Studio.
Automatic Building
The automatic building process is quite hassle-free. If you choose the automatic building process, Tizen Studio rebuilds your app automatically every time you add or modify a source or resource fill in your app, and save it. To use this:
- Click on your project in the Project Explorer
- On the Project tab, select Build Automatically

Manual Building
Manual building allows you to decide when Tizen Studio would build your app. Even if you choose automatic building initially, you can shuffle between automatic build and manual build by simply checking or unchecking a box that appears beside the menu option. To use Manual build:
- Right-click on your project in the Project Explorer
- Click on Build Project
Or
- Select your project in the Project Explorer
- Press F10 on the keyboard

4. Test your Application
Now that our Tizen app is created, configured, and built, it is time to run the app for testing. You can run your Tizen app on the emulator present in Tizen Studio, Samsung TV Simulator, and an actual target device, that is, a Samsung Smart TV device.
TV Emulator
To run your Tizen app on the TV emulator, you need to launch Emulator Manager in Tizen Studio. The emulator manager consists of different device options, you get to select the device you want to emulate. In case your target device does not have an emulator instance, you can create one.
- Go to Tools in the Tizen Studio Menu
- Click on Emulator Manager
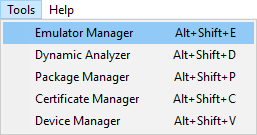
- Choose a TV emulator from the options
- Click on Launch

- Generate a security code by signing your application package with your certificate profile
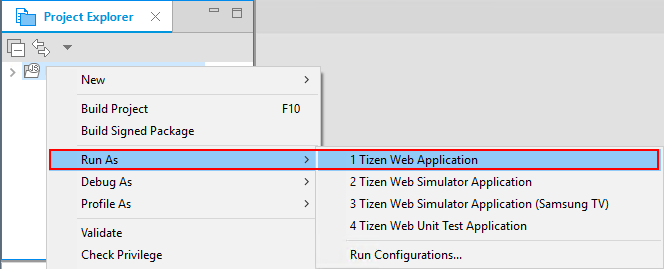
- In Project Explorer, right-click on your project
- Select Run As>Tizen Web Application
Your TV Emulation of Basic Web app would be launched:

TV Simulator
You can also run your application on a Samsung TV simulator before you deploy it on an actual TV Device. This too can be done from the Tizen Studio.
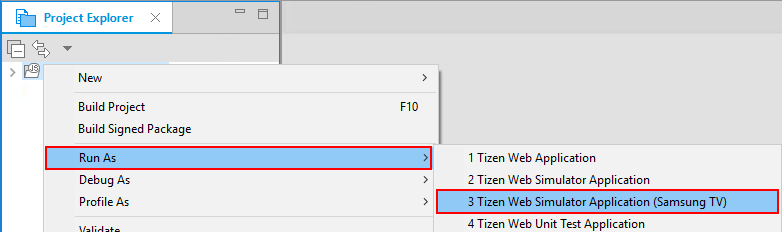
- At Project Explorer, right-click on your project
- On the pop-up menu, select Run As > Tizen Web Simulator Application (Samsung TV)
Your application will be launched on the simulator:
TV Device
Once you have run your app on a TV emulator and TV simulator, you must run it on an actual TV device for final testing.
To do this, you would need to connect your TV device to your computer system and engage the following settings in your TV device:
- Select Smart Hub>Apps
- Enter the “Magic Sequence” (Type in the number keys 1 to 5 in sequence)
- Set the Developer Mode to be ON
- Enter the IP Address of your computer
- Reboot the TV device by clicking OK
Now you must connect Tizen Studio to your target TV device and run the application:
- Open Device Manager in Tizen Studio and click on Remote Device Manager

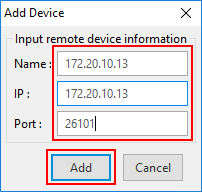
- Click on the + sign at the top right corner of the Remote Device Manager

- Enter the device and network information into the Add Device window and click on Add
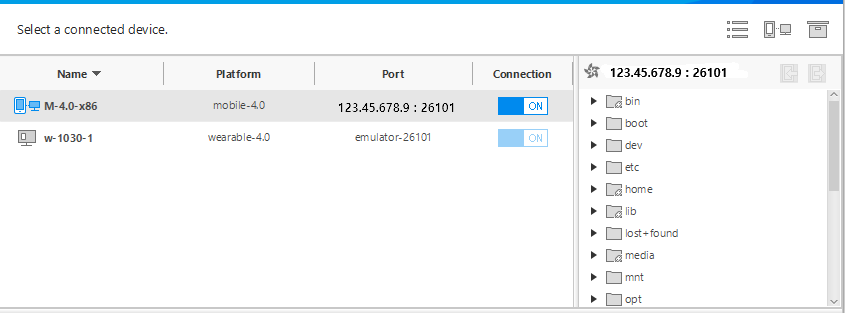
- Switch on the added device on the Remote Device Manager Window

- Right-click on the newly added device and click on Permit to install application
- Generate an author certificate by signing your application package with your certificate profile
- At Project Explorer, right-click on your project
- On the pop-up menu, select Run As > Tizen Web Application
Your app should be successfully launched into your target TV device.
Once you run your application for testing, if there are no bugs, your application is ready to be published!
5. Publish the App on Tizen Store
Publishing your Tizen app for Samsung Smart TV into the Tizen Store is very straightforward. You would simply need to follow the given steps and your app would be live in the Tizen Store.
- Become a member and the request for partnership
- Get your application registered
- Supply all the general app information as necessary
- Upload your app onto the store and verify the information.
- Preview your app and then finally submit it
Final Thoughts
And that was a wrap! We discussed in minute detail all the necessary steps you would have to go through to build a Tizen app. If you have a web app targeted for Smart TVs, you can also very easily export it to Tizen Studio and have a proprietary Tizen app for your platform rather quickly.

Sam took the long path into the world of IT. A post-grad in Bioinformatics, she started coding to build better programs for protein sequencing. Currently, Sam actively writes blogs for 4 Way Technologies. She's always excited about all the new technologies and updates in software development. Sam also writes coding tutorials and beginners guides for, well, beginners.