How to implement firebase authentication in react native apps?

As per a Stackoverflow report, React Native ranks 5th from the top, in terms of preferred app development frameworks by professional developers. It accounts for 16.48% of the total vote cast by professional developers. As a React Native developer, you may want to build a proper authentication system in your app to keep the networks secure. This is what I have covered in this blog. You will learn the implementation process of firebase authentication in react native apps.
What is a firebase?
Firebase is defined as a mobile app development platform that is associated with Google. It provides much more scalability to your apps in terms of building better apps, improving app quality, and growing your business.
There are the following services that you can get from the Google Firebase platform. They are:
- Realtime Database
- Cloud Storage
- Firebase Hosting
- Cloud Functions
- Cloud Firestore
- And most importantly Authentication, which you will be implementing in this blog.
Although there are other services that you can get from the Google Firebase, we will be only focusing on the implementation of Firebase Authentication in a React Native app.
What is Authentication in Firebase?
Authentication in firebase is the way to attain safety and data security during app login. It is the way to know the user's originality so that the app can save their data in the cloud. At the same time, firebase authentication provides a similar personalized experience across every device of the users.
With firebase authentication, you can get ready-to-use UI libraries, backend services, and SDKs, thereby providing hassle-free user authentication to the app.
How does the process of Authentication work in Firebase?
To allow a successful sign-in to the app, firstly you ask for the user's authentication credentials in the form of an OAuth token, email ID, or password. Now you have to pass the obtained information to the SDK of Firebase authentication. Eventually, the backend services look for the credentials for further verification. It then returns output to client servers.
Now that we are done with discussing theoretical concepts, let’s get into the actual steps considering which you can implement firebase authentication in React Native apps.
Getting started with firebase authentication
It is necessary to consider a tool that you can use to prototype and test Authentication functionality. It is the Firebase Local Emulator Suite.
Using the Authentication emulator involves just a few steps. Let's move forward with how to authenticate users.
1. Create a React Native project on your android device.
You can check the tutorial blog on how to create a basic React native app on an android device. Here, we will be using React Native CLI. So you need to create the app using React Native CLI and not on the Expo CLI.
2. Set Up a Firebase project.
As your app takes time to build up. Set up a firebase project.
For this, go to https://console.firebase.google.com/u/0/?pli=1 and click on ‘Add Project’. Give your project a name.
Here, I have given the project a name: React-Native-auth-social.
Click on continue and as you proceed with step 2, disable the ‘Google Analytics for this project option.
Move forward with the ‘Create Project’ by clicking the same button.
As soon as you are done with the steps, you will see the same screen as shown in image 1.

Image 1
3. Move forward with a specific platform authentication
- After the project is ready, click on continue and go to the ‘Authentication’ option located on the left side panel of the home. Refer to image 2.
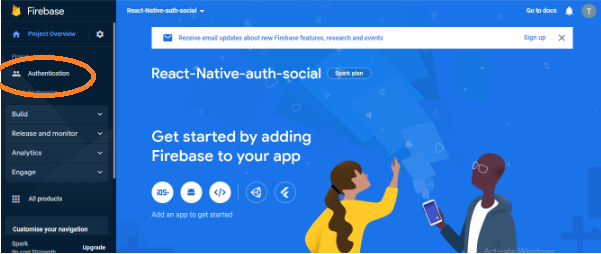
Image 2
- After selecting a specific sign-in method, click ‘Enable’.
- You have to provide a project support email ID and move forward saving it.
- As you see in image 4, the ‘Google sign-in’ method is enabled for my project. Go to ‘Project Overview’ and select the ‘Android’ logo.

Image 3
- After selecting a specific sign-in method, click ‘Enable’.
- You have to provide a project support email ID and move forward saving it.
- As you see in image 4, the ‘Google sign-in’ method is enabled for my project. Go to ‘Project Overview’ and select the ‘Android’ logo.

Image 4
- Now, you will be directed to a screen similar to image 5 where you have to provide the unique ‘android package name’ and ‘Debug signing certificate SHA-1’.

Image 5
- You can get the ‘Android Package name’ from the Androidmanifest.xml file of the project. Refer to the highlighted segment in image 6 for the package name.

Image 6
For the SHA-1 certificate, you have to run two commands cd android and ./gradlew signingReport on your project terminal.
However, first of all, you have to get the ‘Authentication module’ package. For this, run the command npm add @react-native-firebase/auth on your project terminal. Then pass the above-stated two commands.
After the key is generated on the project terminal, you have to take the SHA1 key located under the Variant: debugAndroidTest and not from other variants.
Insert both the unique package name and the SHA-1 Signin certificate into the place (image 5) and move forward, click on the button ‘Register app’.
From here, you have to click on ‘Next’ until you see the button ‘Continue to console’. This will allow you to get into the console screen. Refer to images 7 and 8.
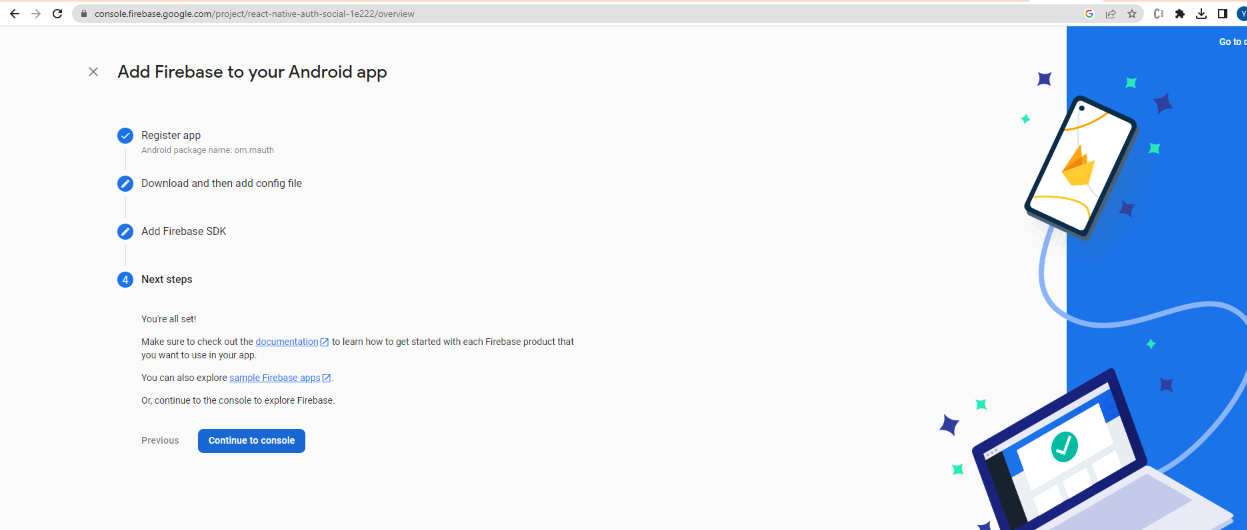
Image 7

Image 8
- Now, click on the encircled part of image 8. This is the Android app that you have recently created and clicking on the encircled part will take you to the project’s settings page.
- Here, you need to put in another SHA1 key. Find the key from the same project terminal but this time, you have to take the SHA1 key from the ‘release’
variant. Refer to image 9.
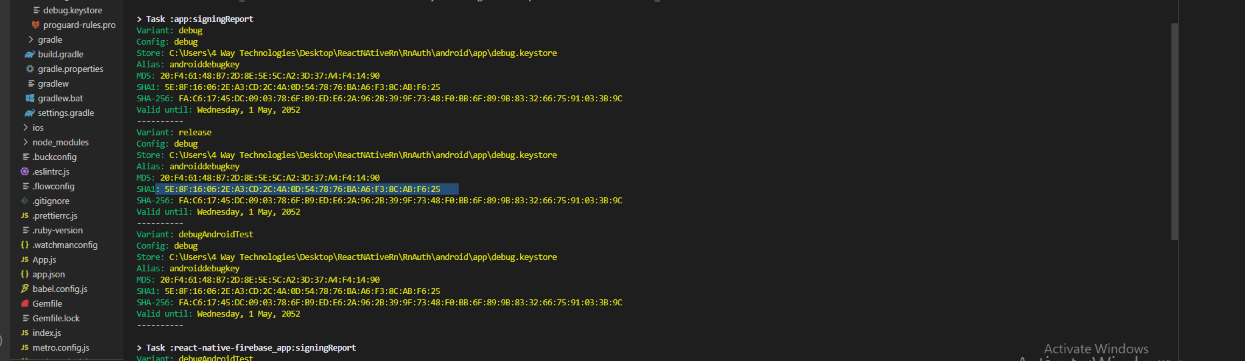
Image 9
- Go back to the project’s settings page and click on the ‘Add fingerprint’ button to add this key. Don't forget to save the key after you have added both the SHA1 key in the project’s settings page.
4. Configuring firebase project with Android credentials
- Before configuring it with android credentials, you have to download the ‘google-services.json’ package from the settings page and add it to your app’s directory.
- Again go to your firebase project settings and download the package ‘google-services.json’. Refer to the highlighted part of image 10.

Image 10
- Note that you have to add this ‘google-services.json’ package to your root directory. You can simply go to your project folder from your local drive and click on ‘android’ and then ‘app’ folder. Paste the package ‘google-services.json’ in the android → app.
- Now, you have to go to the rnfirebase.io and go to the highlighted segment as in image 11.
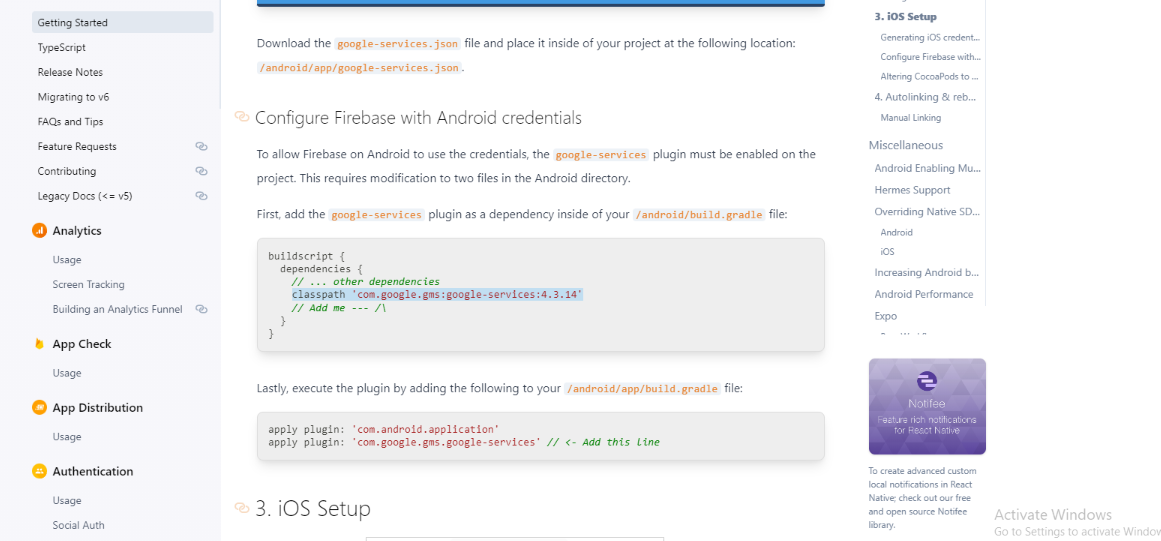
Image 11
- Copy the line classpath
'com.google.gms:google-services:4.3.14'from thernfirebase.ioand paste the line to the build.gradle folder of your project. Just go to your project folder and then to‘android’and lastly to‘build.gradle’. You can refer to image 12 to see how I added the line.
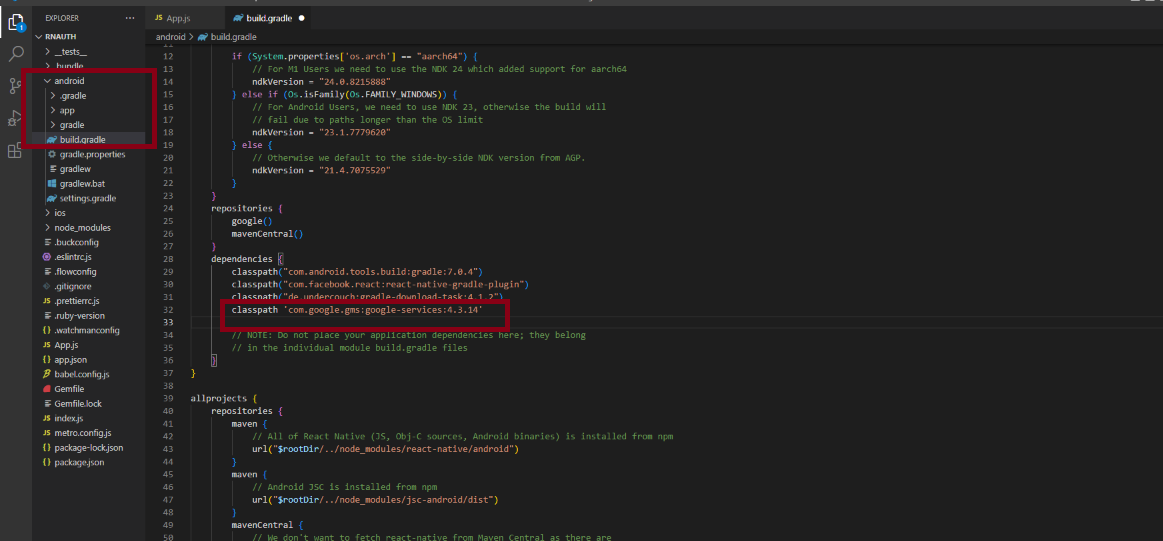
Image 12
- Lastly, you have to add the last line to
android → app→ build.gradle.For the command line, again visit rnfirebase.io and copy the line apply plugin:'com.google.gms.google-services'and paste as shown in image 13.
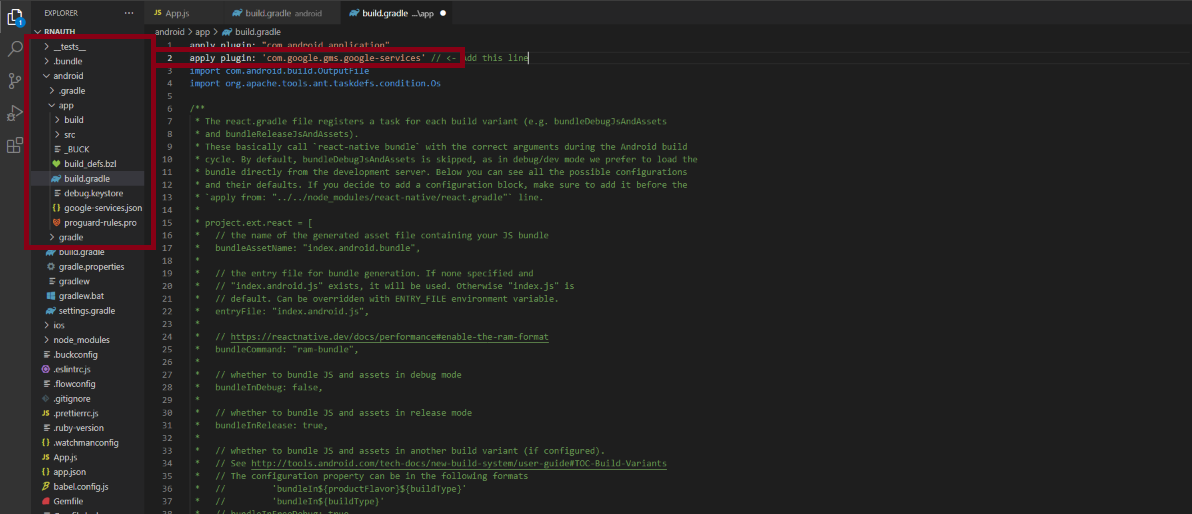
Image 13
- Don’t forget to save them in your code editor with the key: Ctrl and s as you proceed with each step.
Now we are done with implementing firebase authentication in our React Native app.
If you want to move further and set up google sign-in, go to https://rnfirebase.io/auth/social-auth and click on the ‘Social auth’ option located under the option ‘Authentication’.
Since this blog is about implementing firebase authentication in React Native app, we won't cover the Google sign-in method in this project.
Final Notes
The most important part of implementing firebase authentication is to create a project on the firebase portal and link the SHA1 keys to your app directory. As you learn the process of implementing Firebase authentication, you can easily embed different sign-in methods in your app by installing the package. So get your hands on this process.

A science graduate who has a keen interest to lean about new technologies and research area. With an experience in the field of data analytics and content writing, she aims to share her knowledge among passionate tech readers.