Step-Wise Guide For Beginners To Develop Android Application
4 Way Technologies is a leading Android app development company across the world. We have an expert team of developers who are proficient in delivering robust, feature-rich, and efficient Android applications. Along with an impeccable application, we also provide future support for your product as well.
As mobile devices are gaining popularity and audience, so does the mobile application development and different operating systems. And if your mobile app developers and focusing on getting your first application developed in Android. Here is the step to step guide for beginners. But before jumping to the steps of mobile app development, let’s have a look at two things first the definition of Mobile application, and second a peek-a-boo at Android.
This tutorial will give you step-wise in-depth knowledge about Android app development even if you are on a beginner level.
Introduction
This article will help you in understanding the basics of developing Android apps using the Android Studio development environment. Since Android devices are enormously increasing, the demand for Android new apps will also increase. Android Studio is a free and easy to use development environment to learn. If you have a working knowledge of the Java programming language, you will find this tutorial more helpful as Java is the programming language that is used by Android.
What is a Mobile Application?
Mobile application or mobile app is a computer program or software program that is developed for mobile devices, not just phones but also for tablets or smartwatches. Mobile applications were basically developed for essential assistance and productive services like calendar, emails, or contacts the things a person needs handy. But over the years, with the raising in the number of mobile phone users the type of mobile applications also rapidly grow like there are now social media applications, mobile games, etc.
Nowadays there are applications available for every purpose, you want to track your steps – download the application, want to read books why bother to go to market – you can read it on your application all you have to get the application.
In fact, the famous American technology columnist and writer David Pouge renamed smartphones as app phones to distinguish between the earlier smartphones with lesser applications to the modern-day phones available with millions of applications.
Android – The Wonderful Operating System
Android is an open-source mobile Operating System developed by Android Inc. which was before the release of the OS, it was taken over by Google. It is developed on a modified version of Linux and a few other open-source software. It was solely meant for mobile app development but now it has taken over the market for applications on wearable devices and smart TVs as well.
What are the Steps for Developing A Basic Android Application?
1. Install Android Studio
The first step is pretty obvious, to develop android application first step should be to Install Android Studio. While downloading one needs to make sure that it is from Android’s original site and all the requirements for hardware and software meet.
2. Download Java Development Kit (JDK)
Make sure you have JDK installed in your system for Java. If not, go ahead and install it. If you already have you’re good to go ahead.
3. Opt for new Project
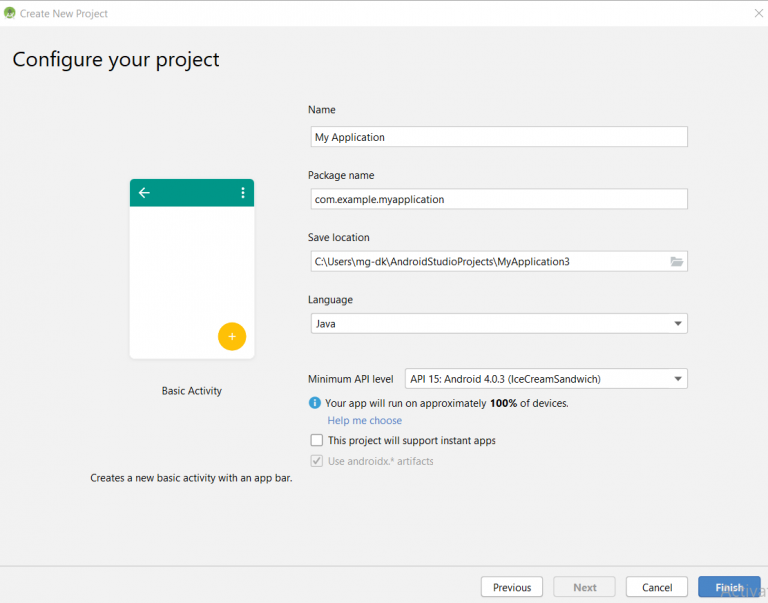
When the setup is done choose ‘Start a new Android Studio Project’. Choose a name that will appear at the store for your application and a ‘domain’ for your company if you’re acting as an individual you can choose something else but decent. This is how it’ll appear: com.companyname.appname. This represents the APK (‘Android Package File’) that will be uploaded to the Google Play Store.
4. Choose an Activity
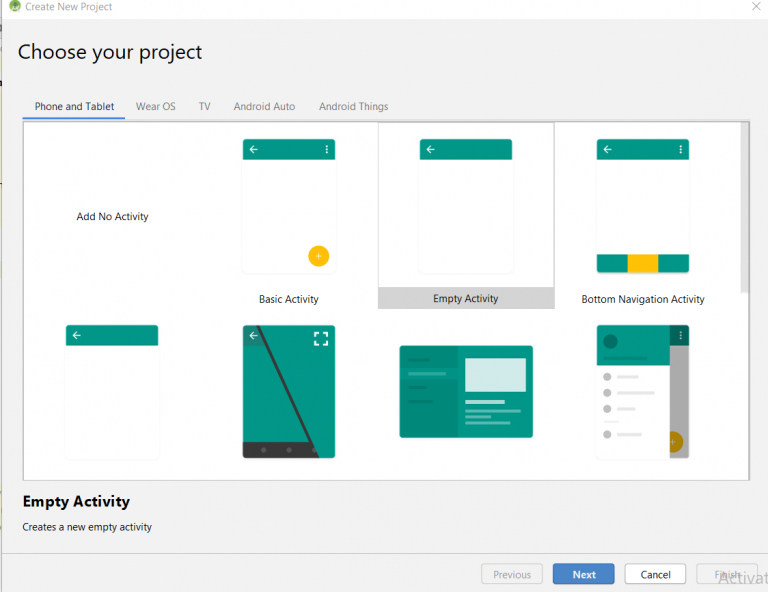
The next step will be about choosing how you want your application to look like. The first ‘Activity’ you choose will represent your application’s main screen. There are various modules available at Android Studio, you have to choose according to the need and the idea of your application. There are full-screen activity, blank activity, etc. But as for the beginners, it’s better to go for ‘Basic Activity’ to keep things simple. Make sure the selected language is Java and not KOTLIN.
5. Choose the desired Layout
After choosing the required activity, comes the part to select a layout name for the chosen activity. The layout will define where the elements like images and menus go and what fonts will be used and visible to the end-users.
6. Edit the textbox according to your requirement
The next step will be about editing, moving, stretching the textbox and other available widgets as per your plan and your applications. When you choose a widget that comes with the default texts, you need to edit the texts, the size, the colour as per your plan of the application.
7. Add buttons and widgets as per your and application’s need
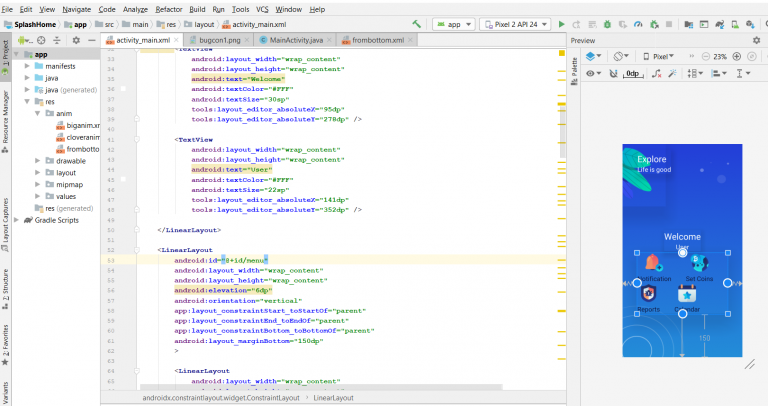
This step is about drag and drop of all the widgets and buttons you need in your application, and renaming them, editing them, adjusting them.
8. Code for the Backend
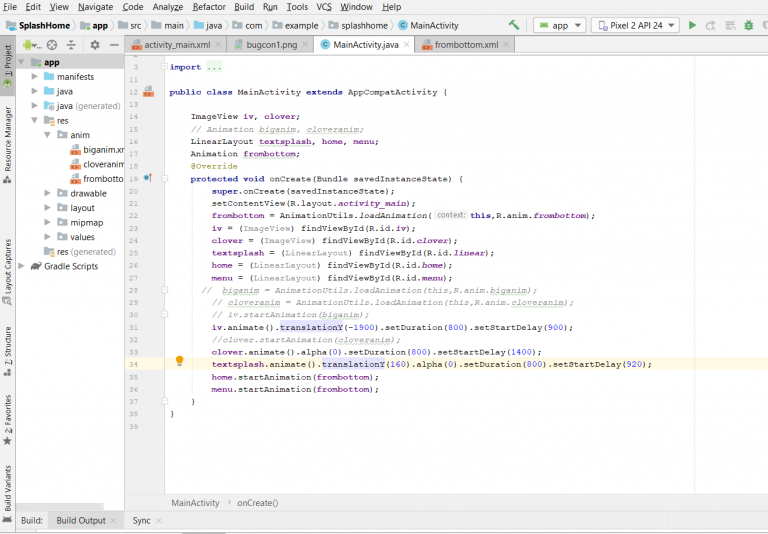
Here, comes a bit of a complex part that is the backend coding. You need to fill in the details of all the widgets you use with their respective functions. And you have to write a code for what your application will do. Android Studio provides code suggestions, so you don’t have to worry much about it.
9. Test Run on Emulator or connected Android Device
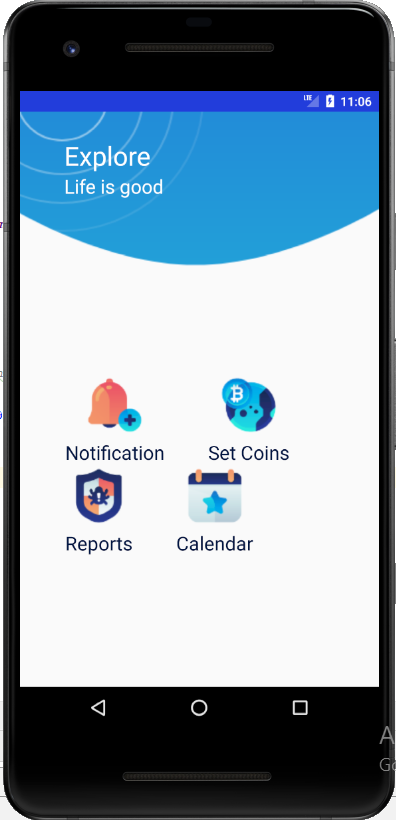
The last step is always about execution. After you think your application is ready, test it to make sure it’s working the way you have planned.
Conclusion
We hope you will find this tutorial helpful as this guide is to help first-time developers so that they can develop their android applications without any complications. You have numerous opportunities to make your “dream app” come true.

A freelancing blogs and e-books writer who keeps you up with the trending technologies and user guides. A blogger who is currently a post-graduate living in United Kingdom and trying to make her niche as a Data Scientist. Before taking a deep dive into the "Data-World", she got a Bachelor's Technology degree in Computer Science and has always dreamed of writing as a kid which inspired her to write wonderful content with the right amount of technical terms to make it easy for the beginners and as well full-fledged developers to grasp a hold onto the computer technologies.